Search this blog

Showing posts with label Home Management and Decor. Show all posts

Thursday, June 26, 2014

A Keeper At Home or a Children's Entertainer: Which are you?

         I am so excited to share this guest post with you today!  I meet Amanda some time ago through a blogging Facebook group.  I really enjoy her writing and appreciate Amanda's perspective on life.  When I sent out a request for guest bloggers Amanda volunteered and I squealed with glee! Thank you Amanda, for taking the time to write for my readers!  I know they are going to love you as much as I do!  Please be sure to go follow Amanda's blog Quiet Workings.   

A Keeper At Home or a Children's Entertainer:
Which Are You?
             
  I wanted to do this mothering thing right.  I wanted to be the perfect mom, the mom who has it all together.  The one who takes her children on play dates and to the park.  The one who comes up with amazing craft ideas and is patient with a 2 year old while others are pulling out their hair.  (Haha, have you met me? Sigh...pipe dreams my friends)

Family picture for Guest Post by Amanda @ quietworkings.com - A Keeper At Home or a Children's Entertainer:  Which are you?  @ATIPicalDay #homemaker #childen #proverbs31 #titus2 #parenting #biblicalparenting


   Now, as luck would have it, apparently society was on my side.  I had women telling me it's okay not to wash your floors, they'll still be there when your children are older.  Laundry's not folded?  No worries, it's just going to be worn again and thrown back in the wash anyway.  You don't want to miss out on the best years of your children's lives.  They're only here for a short time and then you'll regret all that time you didn't spend with them.

I didn't have to justify my actions, everyone else was doing it for me.


            One day I began to think about how women 100 years ago handled this.  Even 50 years ago!   They kept their homes for their husbands.  They had pride in a clean home.  Yes, I'm sure (positive) that they spent time with their children, but it was in teaching them how to care for their own homes.  Children spent a lot more time amusing themselves than in being entertained by an adult.  In fact, listening to stories from older folks, it sounds like they didn't entertain their children at all.

            Then I began looking at my own childhood and memories of my mother.  I have never heard her say that she regrets how much/how little time she spent with us as children, and yet, I don't have any distinct memories of her “playing” with my siblings and I (though I do remember that our house was spotless).  She read to us.  I can remember us snuggled up around her while she read stories, and that is one memory I cherish.  I remember as we got older she taught us to play badminton.   She helped us put together jigsaw puzzles on family vacations, and took us for walks.  She did not, however, entertain us. 

            I distinctly remember a craft box under my mother's desk in our basement.  She would throw toilet paper rolls, meat trays, discarded paper, etc into with scissors, tape, and glue and when we were bored that's where we went.  She sewed clothes for my barbies so that I could play dress-up even though we couldn't afford to buy the manufactured ones.  BUT, she handed me those things and left me to play on my own. 

            Then I decided to see what the Bible said.  And as I studied Scripture, the Proverb's 31 woman figured quite prominently.  I looked at what she did, and while I am sure she did all manner of crafty things (sewing, dyeing clothes, etc) she also made sure her house was clean.  There is never any mention of her playing in the dirt with her children (which she may have done, the Bible doesn't say, but it's not what made her special).   There is no mention of dates out with her husband (which we all need, time and again, but which shouldn't be our focus).

            Instead, the Bible tells us how she made sure that her house was ready.  Yes, she has servants (maidens) that probably did the house work for her and, if you can afford it, I say go for it!  But she cooked all the meals...and back then that took up a lot of time.  So, besides all the things she did to help her husband with the financial side of things (making clothes, etc), she kept up with all the housework as well.  

            Interestingly, Titus 2:5 shows that being a “keeper at home” is part of our calling as women.  I'm not saying you can't work outside the home.  I'm saying that our job is to make sure - whether we have 9 children and homeschool 5 of them, or have no children and stay at home, or are a work-at-home mom, or have a full-time job - that our house is being “kept”. 

            I think, as a society, we have bought into the notion that we need to entertain our children.  And we've forgotten that we were created to be our husband's helpmeet.    

            I have felt this need in my own life, as I stated above.  I found myself getting so bogged down entertaining my child that I failed to see that other areas in my life were being neglected.  My house was a shambles and my relationship with my husband didn't exist because we spent all our time entertaining our children.

            This spring, we moved into a house and I made a decision.  My children needed to learn to entertain themselves so that I could learn to be a Keeper at Home.   My son had learned to live on TV because that was the only way to keep him quiet in our 3rd floor apartment.  He is now being weaned off of it.  It is an amazing day when I can tell my husband that the TV hasn't even been on once.  And our son's active behavior is infinitely better when he hasn't spent time in front of that fast-paced entertainment.  Do I spend time with him?  I certainly do.  He's only 2 and can't be outside by himself so, when he goes outside, so do I.  I play with him for a bit and then I sit on the deck with my almost-10-month old while he plays by himself. At breakfast we talk about his Sunday school lesson and go over his verse and after lunch we sit together and colour for a bit before he naps.   The rest of the time he needs to learn to amuse himself without getting into trouble.  And he can! 

            It's a blessing to see my children playing together.  It's rewarding to see them playing with the toys that used to sit unused in their toy bins.  And it's extremely exciting to see my son develop an imagination as he plays with his toys or marches around our yard with a stick for a sword. 

Are you a Keeper At Home or a Children's Entertainer?   Will you join me this summer in finding a healthy balance between the two?

Amanda @ Quietworkings.com


Amanda worked as a full-time school teacher for two years before getting married and having two wonderful kids.  She blogs about faith, family, food, and fun.  While crafting takes up a lot of her extra time, Amanda also strives to help others through ministry in her church and in the community.  Amanda, also known as Mae, works as the church music director and is hoping to start tutoring and teaching music again in the days to come.

Thank you Amanda for that beautiful and inspiring post!  I know I need to do a better job of finding a balance!  How about you?


~Continue Reading~ Related Posts Plugin for WordPress, Blogger...

Wednesday, May 28, 2014

Labeling Your Images for Better SEO

Labeling Your Images for Better SEO in Blogger @atipicalday #labelingimages #blogger #seo #customizingpins #pinterest

A few weeks ago I decided I needed to do a crash course in SEO (Search Engine Optimization).  I knew very little about SEO and wanted to learn how to better utilize it.  I started to read everything I could find on the subject with the hopes that I would hone some new skills.  Low and behold I came across an article about labeling your pictures for search engines.  It had never occurred to me that search engines can't read my picture.  Without me giving them details about the picture they don't see it, so that could really be costing me page views since I use almost as many images as I do text on my site.

While learning how to label my pictures I also discovered something else.  My pictures titles and descriptions are what Pinterest was grabbing as my labels!  That means I could somewhat control what the image description was when people pin from my site!  I am slowly going back and relabeling all of my pictures and  am already seeing some great results from it!


Here is a quick tutorial for how to label your pictures in Blogger.


  • Hover your mouse over your image and click.  You should see a blue box pop up.  You can adjust your image size and location using this box.  You can also add a caption if so desired.  
  • Click on "Properties" to add a custom description.

Screen shot for Labeling Your Images for Better SEO in Blogger / Step 1: open properties @atipicalday #labelingimages #blogger #seo #customizingpins #pinterest
This image is from a recent post on keeping your family safe online. 

  • Once you have opened the image properties box, your will see a place to put in your image title.  If you have more than one image on a page, give them different titles.  Since this particular image was the only one in this post, I just gave it the same title as the post. 
  • Here is the trick for Pinterest.  If people are pinning from a pin it button on your image, it will most likely pull the image description from this title.  This is your chance to really optimize those pins.  Beyond the title, use hashtags, and I have also started to use my twitter handle which also happens to be my Pinterest handle as well.  This means every time someone pins or tweets that image, I will get mentioned.  Be sure to include your keyword(s) in your title for best SEO.


Screen shot collage for Labeling Your Images for Better SEO in Blogger / Step 2: Enter a image title Step 3: Enter an image description @atipicalday #labelingimages #blogger #seo #customizingpins #pinterest

  • The next line down says alt text:  This is the spot for you to describe your picture for the search engines.  Remember, they can't see your image, only how you describe it.  Many people search images.  I know I have found some of my favorite hair and party blogs that way.  This is simply making it easier for your images to show up in those image searches.  For this picture I wrote baby clicking a computer mouse and then used my full title from above.  On my page if someone pins using the button from the left side of my page it will pull the description from this alt text.
  • Click OK and your all set!  Once you publish that post, your image will be optimized for search engines and your labels for Pinterest customized. (Side Note:  If someone pins using the generic Blogger Pinterest button on the bottom of your blogger post next to comments, only your post title will show up)
For more Pinterest tips read 5 Tips for Making Pinterest Work for You

~Continue Reading~ Related Posts Plugin for WordPress, Blogger...

Thursday, May 22, 2014

5 Tips for Making Pinterest Work for You

I am not going to lie to ya...I love Pinterest.  I am serious.  It is my new Google!  Any time I have to look something up, I head over to Pinterest to see what others have pinned on that subject.  If I need an idea for a Cub Scout craft, I know I will find something there. In need of a recipe for dinner; you can find it there.  And let's just talk for a moment about how Pinterest can help your blog traffic!  Month after month my highest referral outside of search engines is Pinterest!  The best part is that people repin old pins and suddenly an archived blog post can take on a whole new life.
5 TIPS TO MAKE PINTEREST WORK FOR YOU @ATIPicalDay #Pinterest #Bloggingtips #pinning #optimizingposts

Since I started using Pinterest there are a few things I picked up that make it work really well for me.


1) PIN YOUR INTERESTS- One of the wonders of Pinterest is the way you can connect with people having similar interests as you. So pin away and people will find you!  Isn't that nice!  :)

2) JOIN GROUP BOARDS - Group boards can really be an amazing resource since you are with a group of people all pinning on a similar interest!  I have found some incredible pins through my group boards, and have find that the majority of repins for my posts come from my group boards.  If you haven't received an invitation to a group board yet, don't worry!  You can start your own!  

3) CREATE A BOARD FOR YOUR SITE - Having a board that is strictly posts from your blog or business is a wonderful way for people to follow you.  Make this board the first one on your page.

3) KEEP YOUR BOARDS ORGANIZED- Think of your boards as your online filing cabinet.  Make subcategories for items and alphabetize them to make them easier to find.  You can click on a board and drag it to move to a new position.  I also recently moved all of my group boards up to the top of my page.  I did this for two reasons.  First, I tend to forget which group boards I am in, and this makes it easy to find them and review the rules for that board.  Secondly, it makes it easy for others to see that you are a valuable pinner.  

4) OPTIMIZE PINS COMING FROM YOUR SITE - You can customize the pin description on images coming from your site.  I will be sharing how to do that next week.
Jenny at The NY Melrose Family suggests putting your twitter handle, hashtags and lots of keywords in your description.  

5) PIN OFTEN - The more you pin, the more action you get (isn't that true of all social media?).  There are whole schematics out there about what's the best time to pin...ain't nobody got time for that!  Play around and see what works for you.  I find early morning and late evening to be my best times to pin, but I pin all day (cause I luv it so) and generally have good activity all day.


Follow me on Pinterest!  :)

~Continue Reading~ Related Posts Plugin for WordPress, Blogger...

Wednesday, April 9, 2014

How to Clean Ridges Around Sinks and Stoves

*Please note - knives can be very dangerous and cause scratching if used improperly.  Use extreme care with this method of cleaning so as not to endanger yourself or others.

About a year ago, I had my boys take over cleaning the kitchen.  It has been an interesting experience to say the least!  Aside from the fact that some nights it will literally take them hours to finish just loading the dishwasher, things never quite get cleaned the way I would like it.  I pick my battles at this point, and go in about once a month to do a heavy cleaning in there. We are working on improving their skills.
One thing that always drives me nuts when I am doing a deep clean is seeing the dirty, nasty, gunk that builds up on the edges of the stove.  It also happens around the spout of the sink, and in our bathrooms around the sink.  It just really stands out to me and makes the room still look dirty.  My solution to this is quick and easy!  Grab a damp rag and a knife.  You will need to be careful as you do this so that you do not scratch the counters or fixtures you are cleaning around.


Using the edge of the knife, gently trace the seams where that gunk is hiding out.  You will see it starting to build up on your knife.  With each pass, wipe your knife and the seam with your damp rag.  I usually have it done in about 2 passes.


See all of that stuff that has built up!  Nasty!  That was from the second pass too!


After you have wiped everything down, you can stand back and admire how much better this little detail makes your kitchen look!  I have heard people say that they use dental floss to clean these areas as well.  I have never tried it because the knife always works well for me.  I have used toothpicks however, and they also work really well especially in small areas like around sink fixtures.

Once again I apologize for the grainy pictures.  One of these days I will figure out how to get good pictures from my phone!  So are there any areas in you kitchen that you can't stand to see dirty?  How do you keep them clean?

post signature
~Continue Reading~ Related Posts Plugin for WordPress, Blogger...

Friday, March 7, 2014

When Your Rug Goes Walking...

*Please note that this post contains an affiliate link.  I will receive a small commission for anything purchased through this link.  All views and ideas in this post are my own.


I have this lovely runner in my entrance hall (although this picture doesn't do it justice), but it drives me nuts because it never stays on the padding.  I get so tired of fixing this sloppy looking mess!  It is so annoying!  I literally will straighten it, walk away, and when I come back it looks like this picture.  I don't even understand how this happens, but I finally got sick of it!  The pad under it is suppose to be non slip, and I paid good money for it, but you can see how well that has worked for me.  I had also heard that double stick tape might work, but I never remember that when I am out at the store.

A few weeks ago, I was cleaning out a drawer and found some command adhesive strips.  The wheels started turning and I wondered if I might be able to use these to hold the carpet in place.


I took the three strips and spread the out on the padding. 


I then just pushed the rug back down over them and walked on it a few times to help it adhere.
Success!  It is still holding strong and my runner no longer walks!  
Don't you just love when an idea works!  :)


Not following me yet?  What's the hold up?  Go follow me now!  You can find me on Bloglovin, Facebook, Pinterest, Twitter, StumbleUpon, Hometalk or Google +!  

Have a great weekend!
~Continue Reading~ Related Posts Plugin for WordPress, Blogger...

Friday, February 14, 2014

Family Friday - "Light of My Life" Valentine's Day Candle


Happy Valentine's Day!  Today I am sharing a little something my kiddos and I whipped up for the grandparents.  This was a really simple and inexpensive gift to make, and turned out pretty cute. 
First the kids and I took a trip to the dollar store.  We picked up some of these little candle votives.  In hindsight, I wish I had bought circular ones instead.  The kids picked out some candles to go inside them as well.  We bought 3 of each so total cost of this project was $6 and it made gifts for 3 people.


At home I picked a picture of all my kids and played with it on Picmonkey until I had it the way I liked it.  I added a heart cut out and the wording "Light of My Life" with the date.  Next I printed it out on just regular computer paper in wallet size.  It fit almost perfectly on the votive.  I had originally wanted to do it on a vellum paper so that you would see the candle through it, but I didn't have any, so I just used what was on hand.  


Next I made some homemade Modge Podge using 1 part Elmers School Glue and 1 part water.  I just put it into an old baby food jar and shook it up.  Then I painted the label onto the votive. 
 After the first coat, I noticed that the homemade Modge Podge had dried on the glass making it look frosted, so I went back and painted all of the glass.  I really liked the effect.  When doing this be really careful not to drip, it will show when it dries.  Also make sure each coat dries completely before applying the next coat.  The color in my picture did fade slightly from the acid in the glue, but I actually kind of like the way it looked.


If I do this again I may try printing the picture on photo paper and laminating it then gluing it to a wide ribbon.  I think that would work well and be really pretty too.
What gifts did you make this valentine's day? 


Linking up at Fabulously Creative Friday, Foodies and Crafties Soirée,  My Romantic Home: Show and Tell Friday, Weekend Wind Down, Strut Your Stuff Saturday Link Party, Simply Gloria, Krafty Inspiration Thursday, Best of the Weekend, and Sunday Showcase
post signature
~Continue Reading~ Related Posts Plugin for WordPress, Blogger...

Monday, April 22, 2013

Meredith's Top 10 for April -Celebrating Earth Day


Here are my top ten ways to celebrate Earth Day 2013 

 
1) Turn off your electronics and head outside for a family picnic

2) Plant a tree with your family

3) Build a compost bin (My kids are dying to try making a worm compost...bleck!)

4) Pick up trash in your local park or neighborhood

5) Shop with fabric/ reusable bags

6) Put up a bird feeder or house that you made

7) Volunteer or sponsor your local nature preserve

8) Attach rain barrels to your down spouts.  Use the collected water for your garden and plants.

9) Set up a home recycling center and teach your children how to use it.

10)  Give your dryer the day off...hang laundry outside to dry

How would you celebrate Earth Day?  Leave a comment and let me know!  Let's see how many ways we can come up with!
 
This post is linked up at:
Manic Mondays at Serendipity and Spice


More the Merrier Monday


~Continue Reading~ Related Posts Plugin for WordPress, Blogger...

Thursday, April 18, 2013

Removing Permanent Marker from A White Board

 
"Mom!  Buzz wrote on your white board with permanent marker!"  Sighing deeply, I slowly walked down the steps wondering what I would find when I got to the kitchen.  As I was walking, I tried to think about how I could remove whatever artwork my second born had done.  Turing into the kitchen I could see Buzz frantically rubbing our calendar trying to remove the ink. 
"I am so sorry mom!  I didn't know it was a permanent marker.  I was just trying to write up some numbers for next month." 


After examining what he had done, I was pretty sure I could remove the graffiti.  I grabbed one of the dry erase pens from my drawer and handed it to Buzz.
 
 
"Just color over what you did with this.  Completely cover it."  Looking at me like I had lost my mind Buzz said, "OOOKAAAY". 

After he had completed this step I handed him a dry paper towel. 
"Try wiping everything off now."


As he wiped I could hear him sigh with relief.  This little trick had worked. 

 
After repeating this step, you can't even tell the permanent marker was there.  (We also tried a Mr. Clean Magic Eraser, but it just smeared the ink but didn't remove it all.)  Buzz has learned his lesson, and I picked up a new trick! 
 

post signature
~Continue Reading~ Related Posts Plugin for WordPress, Blogger...

Wednesday, April 17, 2013

Easter Lily Care and a Few Other Pretty Arrangements


Easter Lilies are such a pretty symbol of spring.  I just love the big beautiful blooms they produce.  Indoors the blooms can last for several weeks.  This one has been blooming for over two weeks now and still has more blooms coming on it every day.  To keep these looking beautiful through the season, here are a few things I do. 
 
Most of these will come with some colored foil around them.  Take that off.  It traps water and can cause you to over water the plant.  Plus it just isn't that attractive.  Instead place the plant into a pretty pot with a drain hole.  It is actually better to under water Easter Lilies rather than over watering.  

 
When blooms open remove the yellow anthers before the pollen starts to shed. I do it as soon as I notice the bloom is open. Simply grab the anthers and gently pull.

 
The anthers will pop right off into your hand.

Dispose of these and wash your hands.  Removing these will help your blooms to last longer, and keep the plant from spreading pollen all over your furniture or staining the flower.  Once the blooms die, simply snap them off.  This will keep your Lily happy and healthy. 
You can continue to enjoy your Lily year after year by planting it outdoors once danger of frost has past.  For best results, plant them once all the blooms have fallen off.

 
Here are a few other arrangements I have around the house right now.  These forsythia branches make a beautiful arrangement and are prefect for a space where you need something larger.  These are sitting in my front hall.  There is a little alcove between our steps and the powder room.  This drum table fits in there perfectly, but I always have a hard time deciding what to put on it.  I love this over sized vase with the forsythia for this spot.   


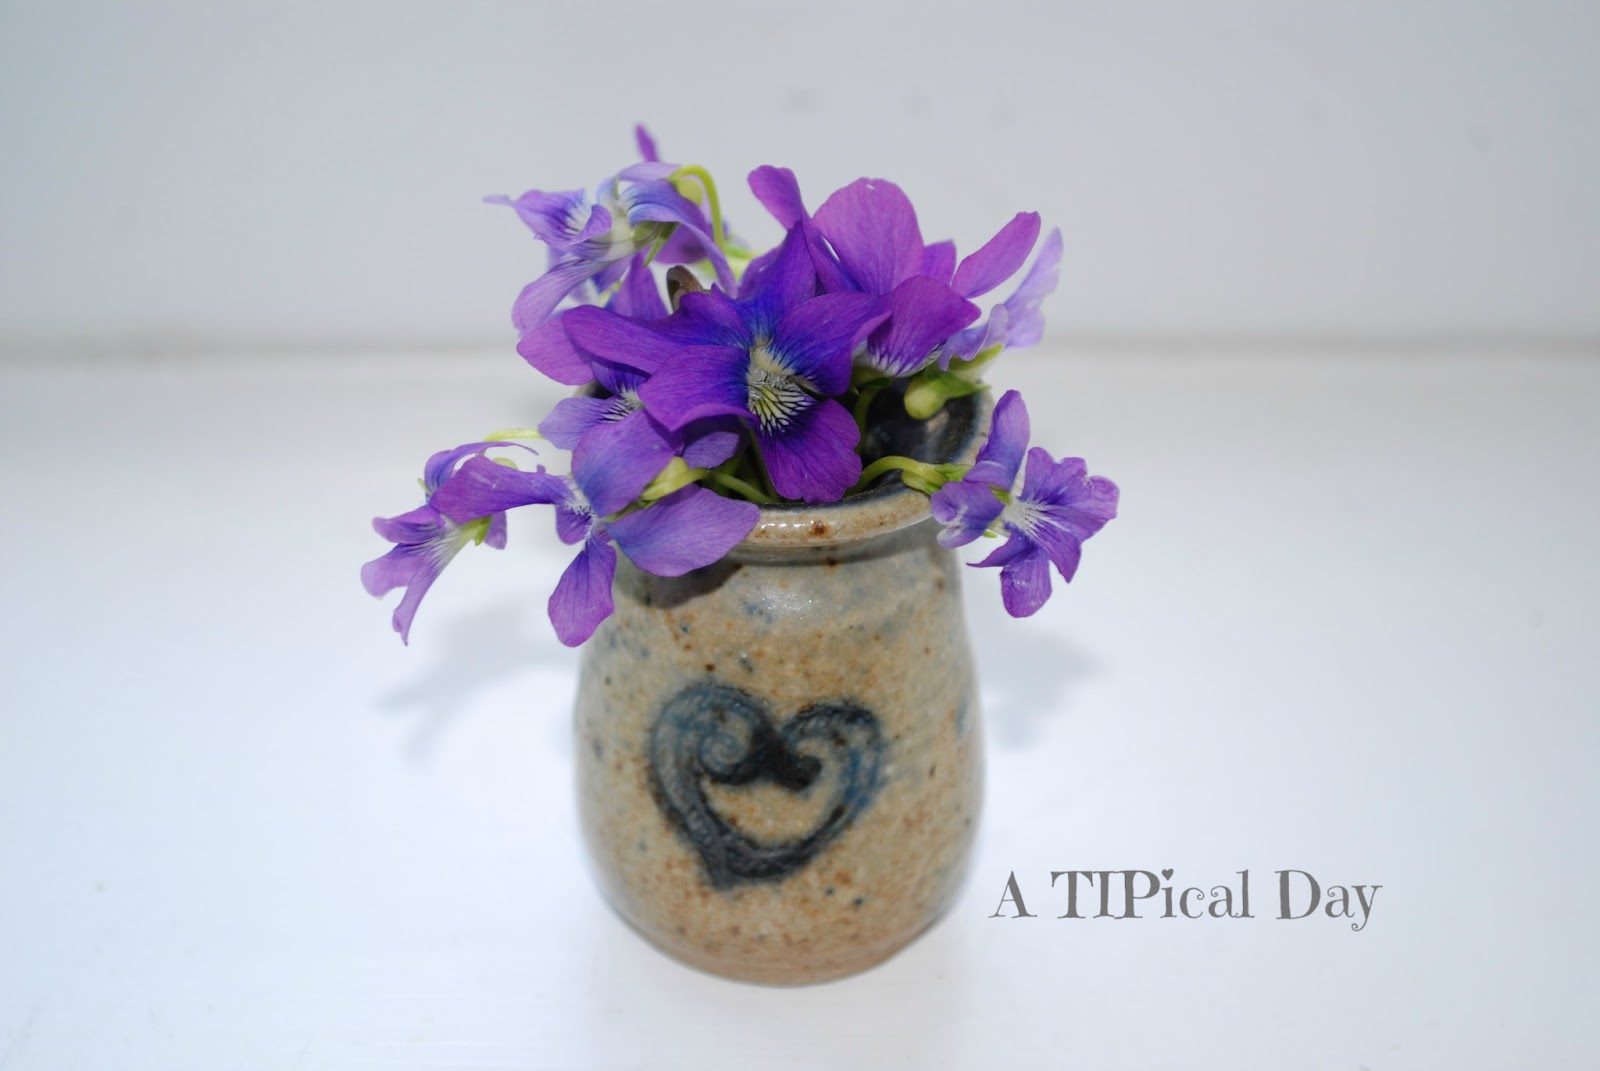
These little violets are just some the kids picked out of the yard for me.  I love this sweet little vase.  If you don't have one this small, consider using a toothpick container, or a film canister that you decorate to display those precious little treasures that your children bring you.  Actually these little vases would probably be the perfect mother's day gift.  :)

 
I would love it if you would follow me!  If your a blogger, leave me a comment and I will follow back.  ;)
post signature

Linking up at
 
button

Thursday Favorite Things

~Continue Reading~ Related Posts Plugin for WordPress, Blogger...

AddThis